What is a fallback subdomain in blogger?
After the Blogger Dashboard setting has been changed anew, The fallback subdomain is a great option. You will be surprised to know about its effectiveness.
The fallback subdomain is very important for every blogger. If you do not know this, then maybe you will miss a lot. This time I will discuss with you the features of the Blogger fallback subdomain and how to set it up.
What is a subdomain?
Let us know about the meaning of the subdomain. We can call a subdomain a second-level domain. A domain is created by putting some words before your root domain. If you want to create a subdomain for your shop, Then your subdomain will be shop.example.comOr if you want to create a subdomain for your blog, Then your subdomain will be blog.example.com
What is the fallback subdomain in blogger?
This fallback subdomain is a subdomain that acts as a fallback before any previous crash when your domain is loaded.Also read
add google analytics to blogger
create contact us page in blogger
Not only that, you have to make some changes in your DNS settings.
If you complete all the process correctly then it is turned on in your blog
How to enable it in blogger.
It's very easy to turn on a blogger. I am discussing step by step how to launch it on Blogger. You must take a custom domain to turn it on. And it has to be turned on by changing the DNS of the custom domain.- First, open the blog dashboard.
- Then click on the three-line of the top left corner.
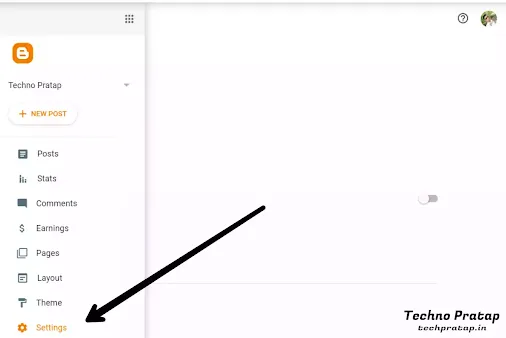
- Then click on the setting option, As shown in the picture.
-
- Then click on the fallback subdomain option, As shown in the picture
-
- Then enter your subdomain name, As shown in the picture.
-
Not only that, you have to make some changes in your DNS settings.
- Login to the domain registrar from which you bought the domain.
- Then you go to the Manage DNS option.
- Then add a DNS record which will be a CNAME record.
- Then fill in all the fields as shown in the picture.
-
If you complete all the process correctly then it is turned on in your blog


![[Updated] How to add slideshow to blogger](https://blogger.googleusercontent.com/img/a/AVvXsEj_XbGT8D9dX2ibZZU5o3RWyR8lPDLlM1_cNErmIGZwVsomdHwclvtEhNxQZzjZ3pkUkxO0-O9zlAq-h7lv77l6rD55y7G_7FTN98Va97s74jDqz6OQXDEzsZm3yykyV-YjmuevV50zT8UF6kH4El7xMxrQ9JL0SkrbEsNwM6hDuK7m2IwcvB9L-Jpm=w100)

0 Comments